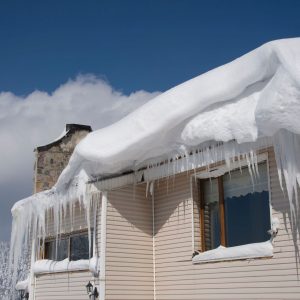
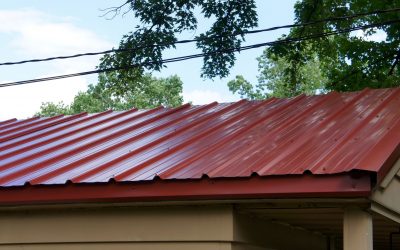
When winter approaches, homeowners face a common concern: the risk of ice dams forming on roofs. Ice dams can cause water damage, leaks, and even structural problems in your home. One effective solution to prevent this is using roof heat tape, also known as roof heat cable. In this comprehensive guide, we’ll explore what roof heat tape is, how it works, its benefits, and how to install it properly. Whether you’re a DIY enthusiast or planning to hire a professional, understanding heat tape for roofs can help you safeguard your home during harsh winters.
What is Roof Heat Tape?
Roof heat tape (also referred to as roof heat cable) is a heating cable installed along the edges of your roof, particularly in areas prone to ice buildup. The purpose of this tape is to melt snow and ice, preventing it from accumulating and forming ice dams that can lead to water infiltration into your home.
Roof heat tape typically comes in two forms:
- Self-regulating cables: These automatically adjust their heat output based on the temperature, making them energy efficient.
- Constant wattage cables: These maintain a consistent temperature and are often more affordable but less efficient.
How Does Roof Heat Tape Work?
Roof heat tape works by heating the areas along your roof’s edges where ice dams tend to form. Install the tape in a zig-zag pattern to maximize surface coverage, which helps melt snow and ice before they become problematic. When connected to a power source, the roofing heat tape warms up, keeping water flowing through your gutters and preventing blockages caused by freezing temperatures.
Heat tape for roofs is particularly useful in regions with significant snowfall or where temperatures fluctuate, causing snow to melt and refreeze.
Benefits of Using Roof Heat Tape
Installing heat tape for roofs offers several benefits that make it a popular choice among homeowners:
- Prevents Ice Dams: The primary advantage of roof heat tape is that it prevents ice dams from forming. Ice dams can cause leaks, structural damage, and costly repairs, all of which can be avoided with proper heating solutions.
- Protects Gutters and Downspouts: Heat tape ensures that water flows smoothly through your gutters and downspouts, preventing clogs and the buildup of ice that can cause damage to these drainage systems.


- Energy-Efficient Options: With self-regulating cables, heat tape can be energy-efficient, only using the necessary amount of energy based on the surrounding temperature.
- Cost-Effective: Compared to the potential costs of repairing water damage or replacing a damaged roof, installing heat tape offers a cost-effective solution that saves you money in the long run.
- Easy to Install: Professionals typically handle large or complex roofs, but homeowners with basic handyman skills can tackle heat tape installation as a DIY project.
How to Install Heat Tape for Roofs
Installing roof heat tape can be done by a professional, but if you’re up for a DIY challenge, follow these steps to ensure proper installation:
1. Plan Your Installation
First, measure the length of the roof area where you’ll install the heat tape. This will help you determine how much heat tape you need. You’ll also need to identify where ice dams typically form, such as along the roof’s edges and valleys, near gutters, and around downspouts.
2. Purchase the Right Heat Tape
Choose between self-regulating heat tape or constant wattage cables, depending on your needs and budget. Self-regulating tape is more energy-efficient, while constant wattage cables are a more affordable option.
3. Install the Heat Tape in a Zig-Zag Pattern
Start at the edge of your roof and run the tape in a zig-zag pattern, making sure each section of the tape touches both the roof and the gutter. The tape should cover the areas where snow and ice are most likely to accumulate. Secure the tape with clips or fasteners to keep it in place.
4. Connect to a Power Source
Once the tape is securely in place, connect it to a nearby power source. If you’re not comfortable with electrical work, it’s a good idea to hire a licensed electrician to handle this step.
5. Test the Heat Tape
After installation, turn on the tape and monitor its performance. You should see snow and ice melting in the areas where the tape is installed. If the tape doesn’t heat up properly, you may need to check the power connection or troubleshoot the cable.
Common Mistakes to Avoid During Installation
While installing roofing heat tape, there are some common mistakes to watch out for:
- Not covering enough surface area: If you only install the heat tape in a small section, you won’t effectively prevent ice dams. Be sure to cover all vulnerable areas, including gutters and downspouts.
- Skipping professional help for electrical work: Electrical connections can be tricky, especially in older homes. If you’re unsure about this step, it’s always best to consult a professional.
- Ignoring maintenance: After installation, check your heat tape regularly to ensure it’s still working. Snow, debris, and weather can sometimes damage the tape, so routine inspections are important.
When to Turn on Roof Heat Tape
Roof heat tape is most effective when used before ice dams form. It’s best to turn on your heat tape as soon as you expect snowfall or freezing temperatures. Most modern heat tape systems can be controlled via timers or thermostats, making it easy to automate the process.
Self-regulating tapes are especially convenient, as they will adjust the temperature based on current conditions, providing heat only when necessary.
Protect Your Home from Winter Damage Today!
Ice dams and roof damage are preventable with the right tools and techniques. Don’t wait for winter weather to cause costly repairs. Install roof heat tape to keep your home safe. Whether you’re a DIY homeowner or seeking professional installation, this simple investment can save you from the headaches of winter-related damage.
Ready to safeguard your home this winter? Contact a roofing expert today for a consultation on heat tape for roof installation and enjoy a worry-free winter season!


